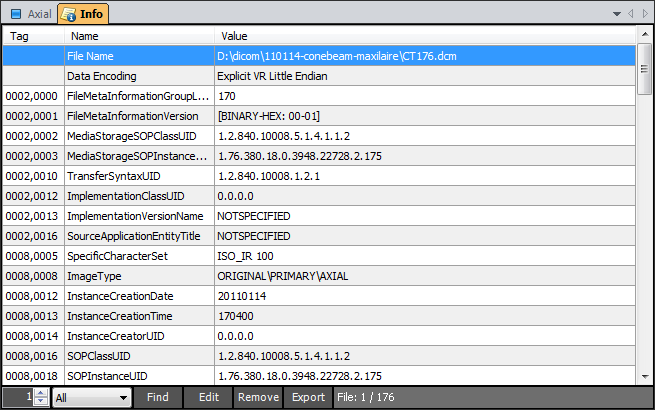
File Information
Using the Info window you can easily view the DICOM tags and their values for each file of the serie.
You can quickly filter the tags by type or search for any text in the tags value.
You can also edit or remove any tag in the selected file or in every file of the serie.
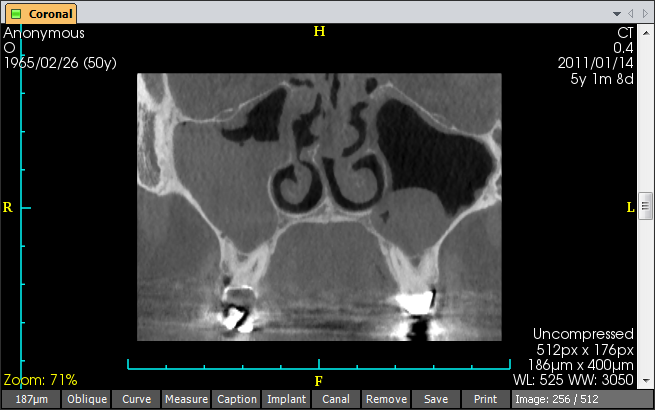
Image Information
Each image has annotations which give you information about the patient (name, sex, birth date) the serie (modality, date-of and time-since acquisition) and the image (compression, size, thickness, window).
There are also information about the current view such as the orientation, the scale and the zoom factor.
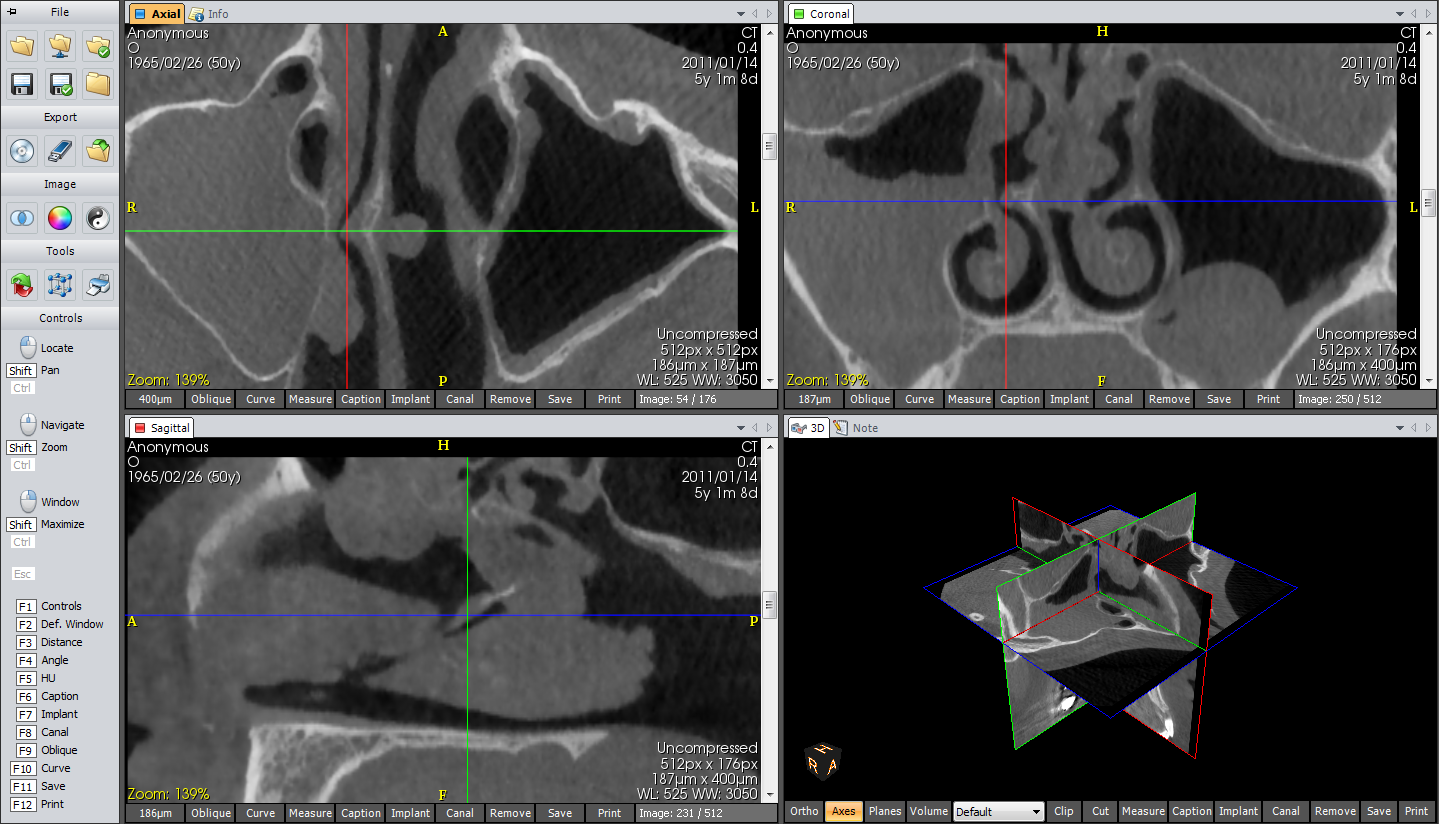
Image Nagivation
Using keyboard or/and mouse controls you can quickly navigate images, pan, zoom and adjust contrast (window level / width).
In default orthogonal MPR mode pan, zoom and constrast are synchronized between views (axial, coronal, sagittal) and you can quickly locate a point in every views by simply clicking on it in any view.
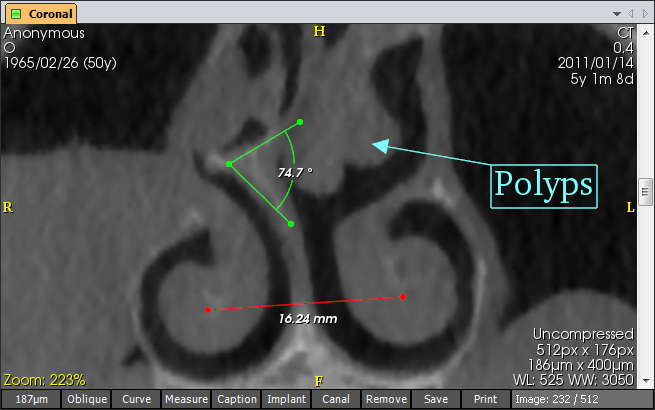
Image Measures
On every image you can measure the distance betwen two points and the angle between three points.
You can view the Hounsfield Unit (voxel value) distribution graph within a circle/ellipse and measure its area.
You can also add a caption with an arrow which points to an area of interest.
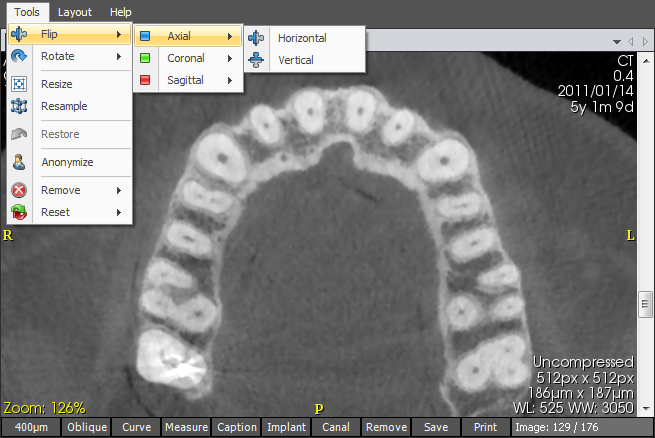
Images / Volume Tools
Each image can be printed or saved to a BMP, PNG, TIFF or JPEG file.
You can flip or rotate the whole volume from any view.
You can also resize or resample the whole volume to create a smaller serie and you can anonymize all the images to preserve privacy.
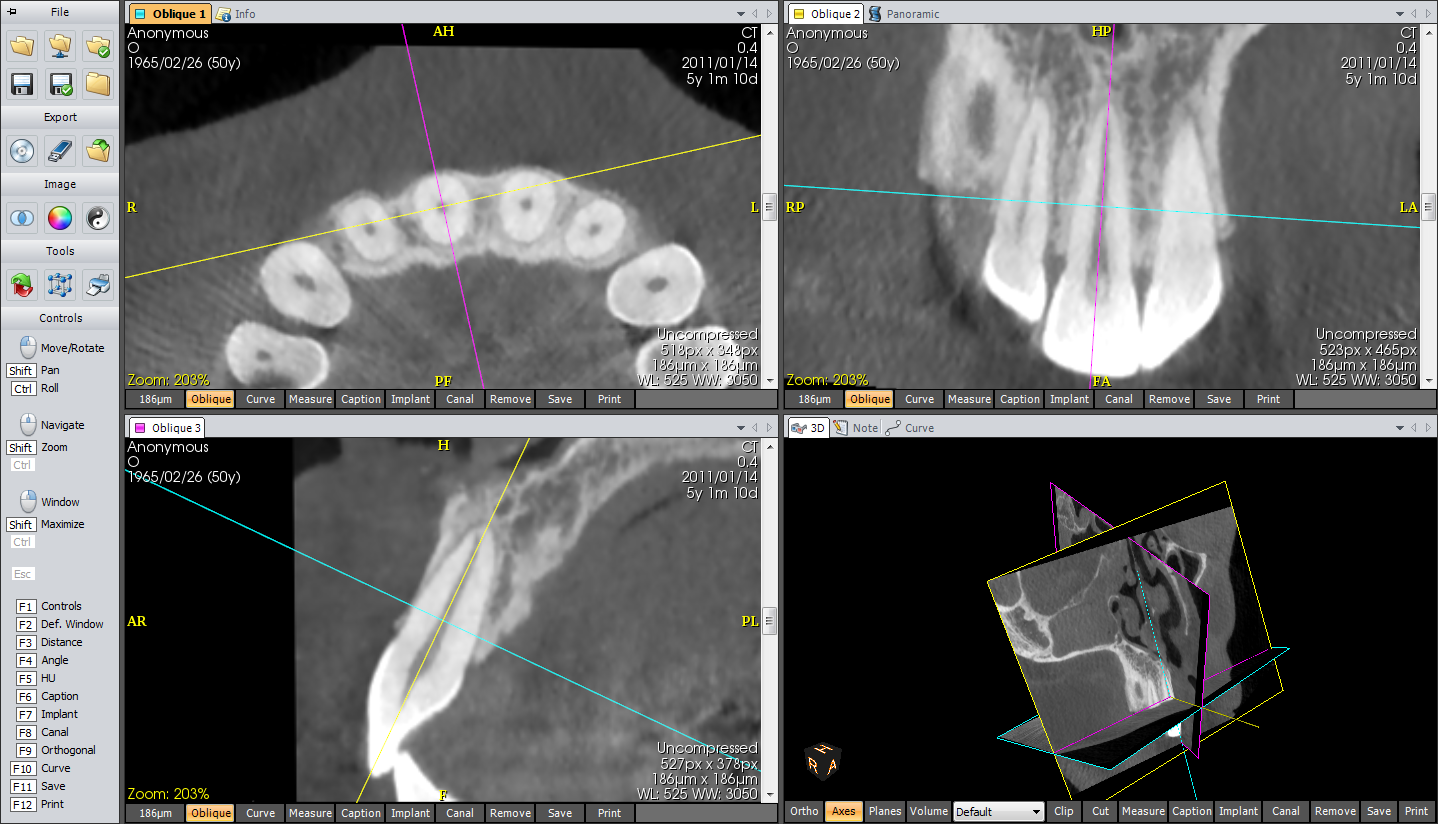
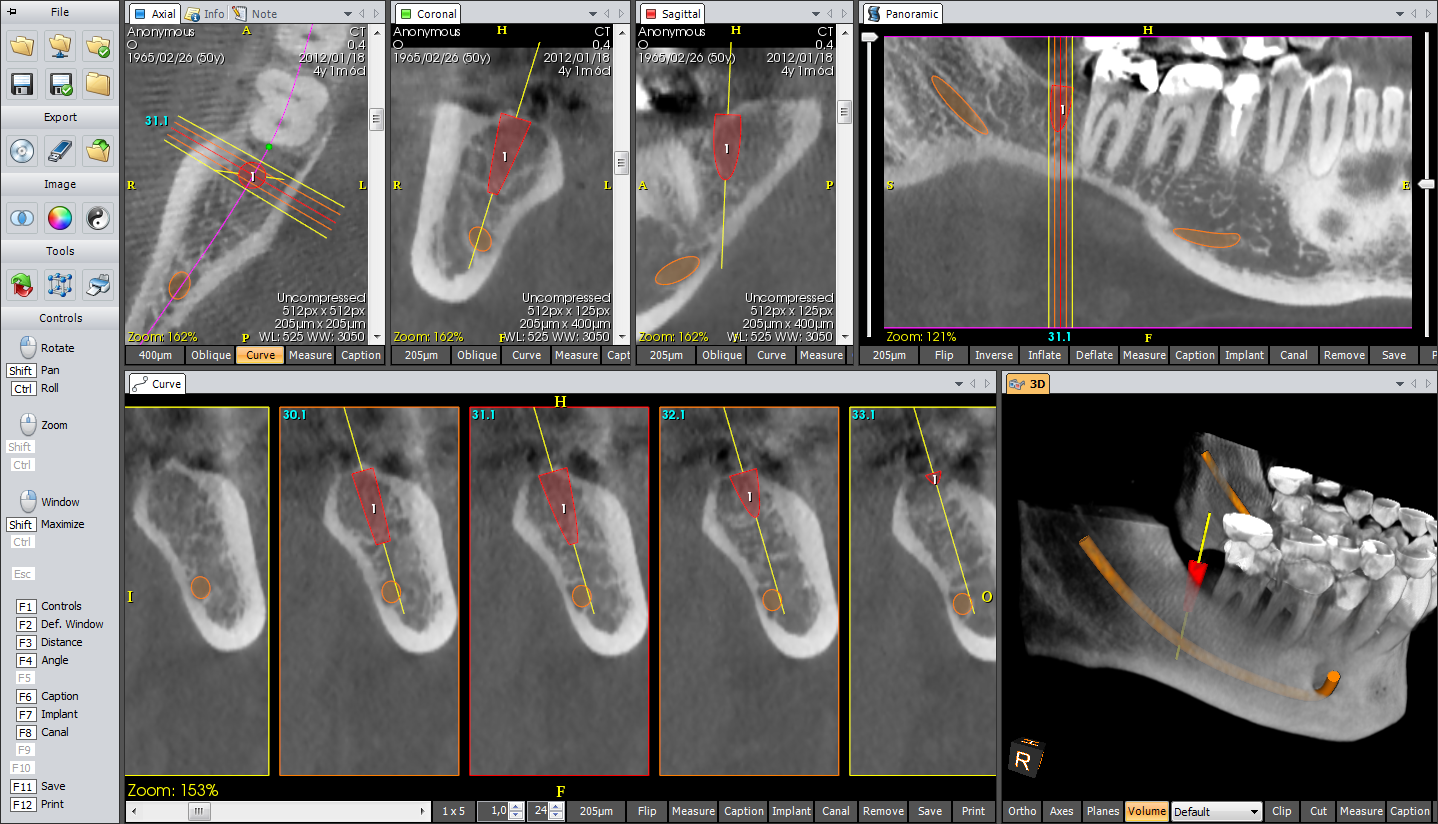
Oblique MPR (Multi-Planar Reconstruction)
You can quickly switch from orthogonal MPR (the default) to oblique MPR by clicking on the "Oblique" button in any view.
In oblique MPR all the views are centered on the origin of the axes, the origin can be moved around and the axes can be rotated on any view using the mouse.
Multiple interpolation algorithms are available and the slab thickness can be changed.
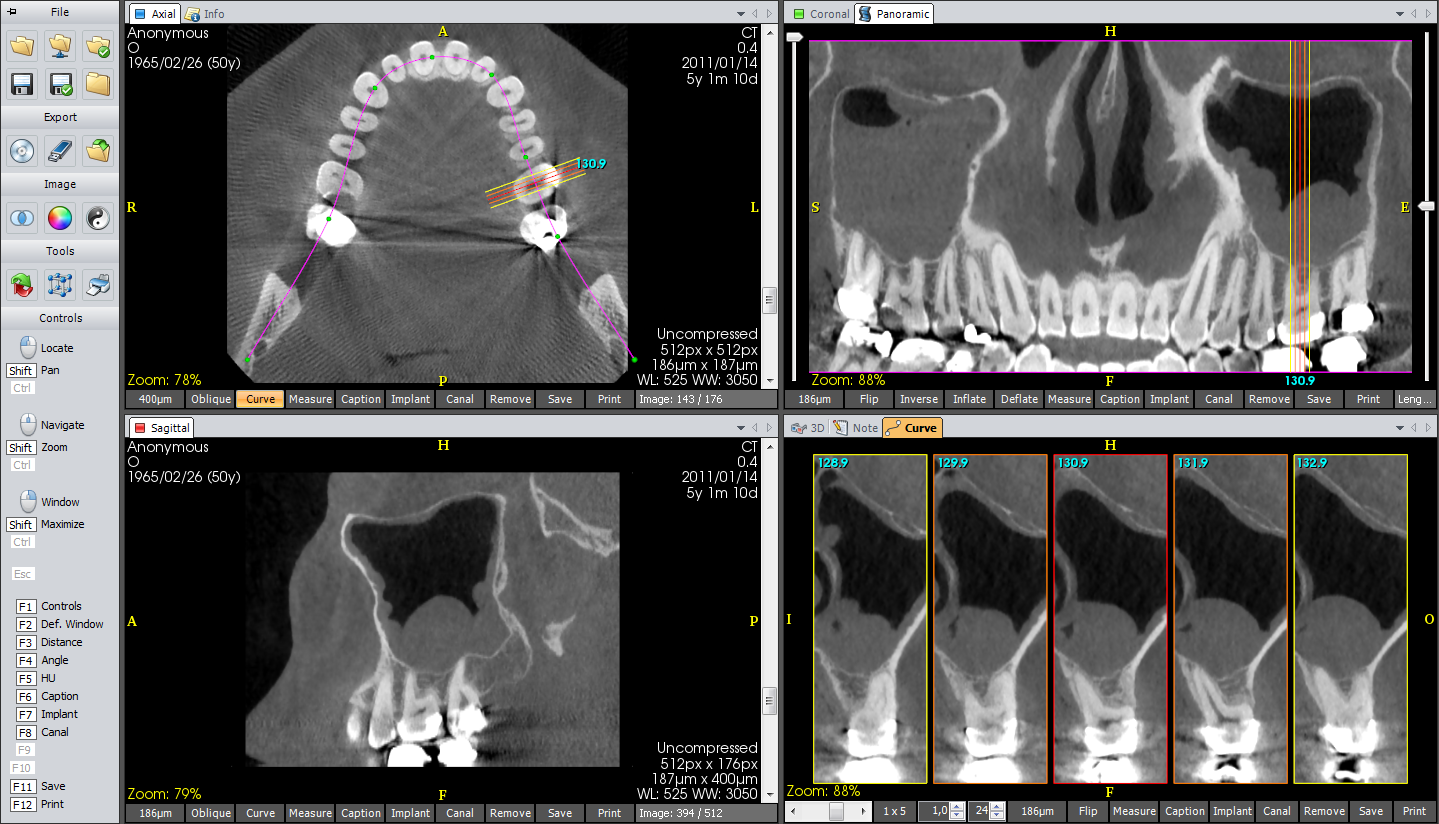
Curved MPR
From any MPR view you can quickly draw a curve then see the panoramic image and navigate the perpandicular slices along the curve.
From the panoramic view you can quickly modify the center and the height of the plane along the curve.
From the curve (slice) view you can quickly modify the number of slices, their spacing and their width.
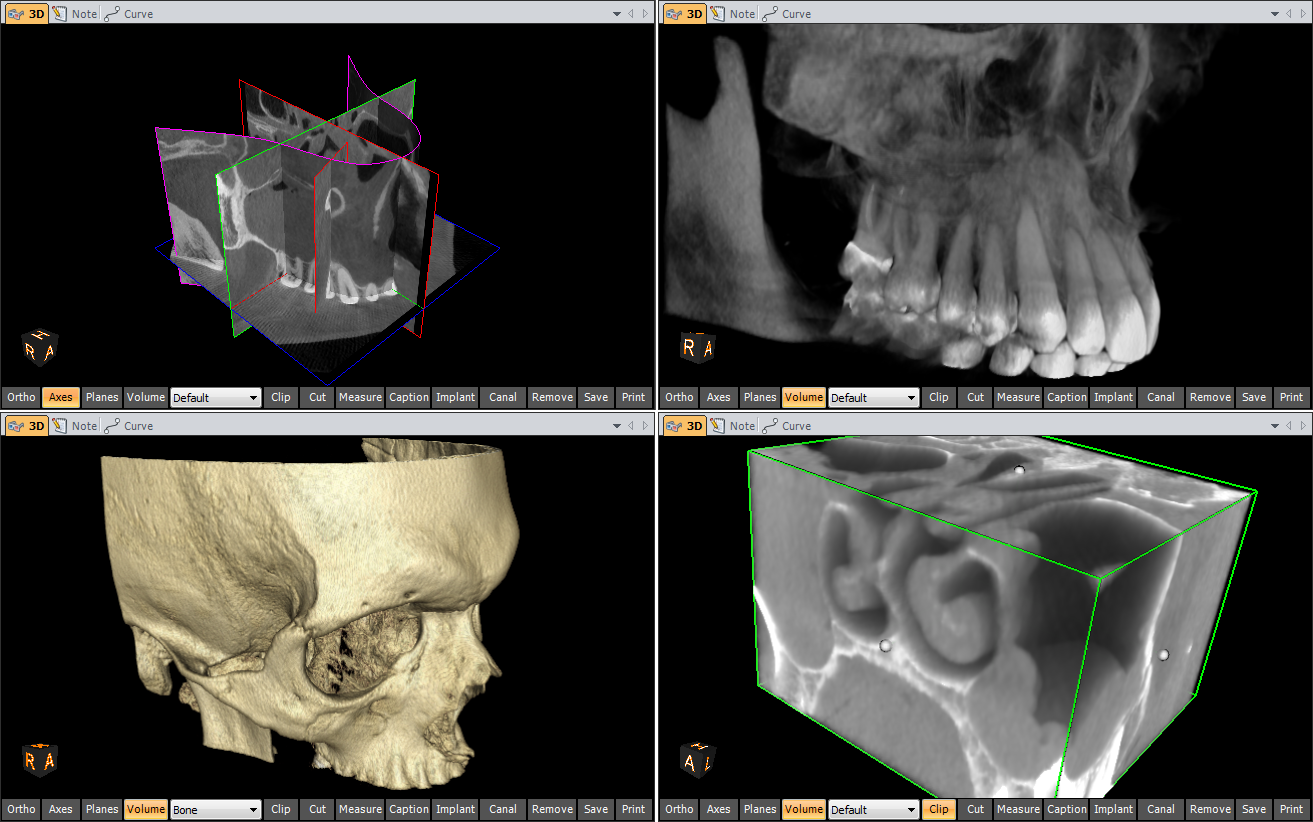
3D View
The 3D view can display the MPR axes, planes and slice with their images to quickly spatially locate the MPR views.
The 3D view can also render the whole volume with different mapping which can be adjusted by simply dragging the mouse.
From the 3D view you can clip the volume by a box or a plane and cut the volume along the clipping or simply draw a cutting shape.
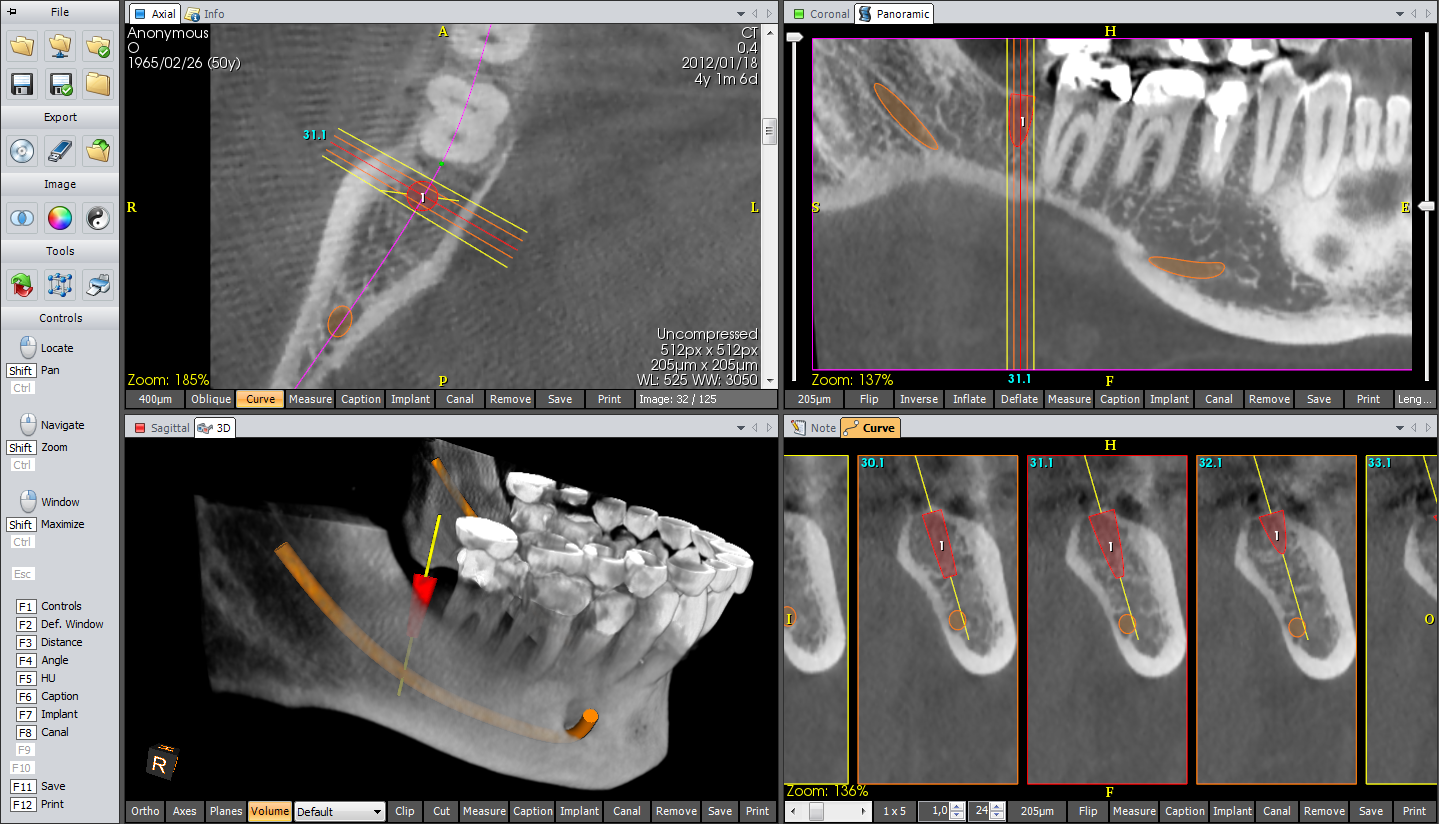
Implantology
On any MPR or 3D view you can add a dental implant then move it or rotate it from any view.
You can also easily draw a mandibular canal on any view by simply clicking on a few points, the application will automatically generate the full canal by interpolating through the points, you can adjust it afterwards by moving it from any view.
You can also view the bone density around the implant by showing the Hounsfield Unit distribution graph.
User Interface
The current state of the serie including the views, implants, measures and captions is automatically saved when the serie is closed and restored when opened again.
Each view can be resized and moved around to create different layouts which can be quickly called back by keyboard shortcuts.
To quickly learn how to use the application, the left sidebar interactively shows all available mouse/keyboard actions depending on the curent location of the cursor.
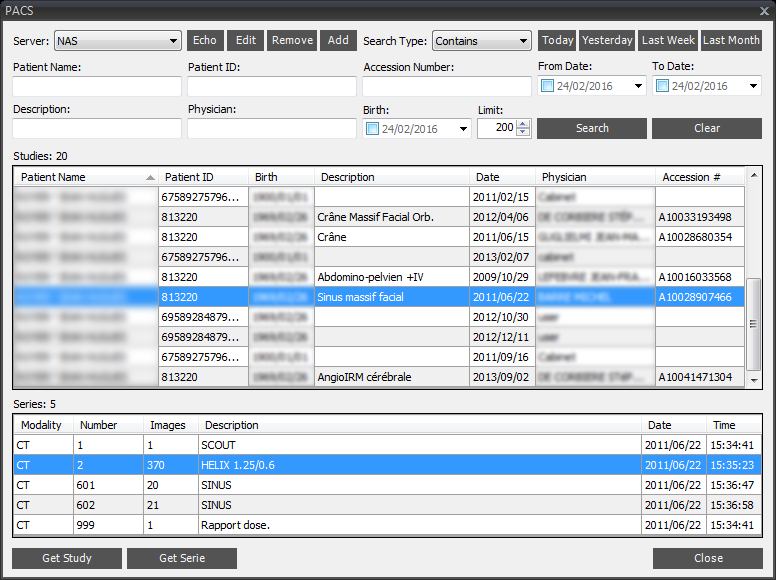
PACS
You can load DICOM studies or series from any folder by simply selecting one single file.
You can also configure multiple PACS servers, search for studies using multiple criteria and retrieve the full study or just a single serie.
You can also export a study or serie loaded from a folder (or from a PACS server) to one of the configured PACS servers.
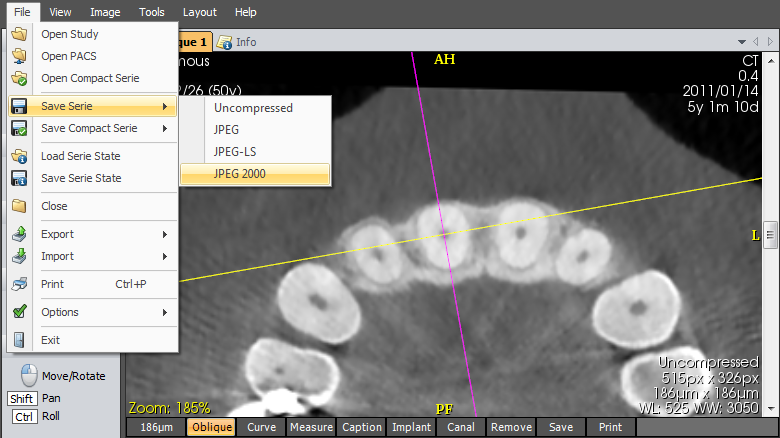
Save Images
After anonimyzing, flipping, rotating, resizing, resampling or cutting the images you can save them back to DICOM files.
You can also save them to one single compact serie file which will also contain the serie state with the views, implants, measures and captions.
You can select different compression algorithms (JPEG, JPEG-LS, JPEG 2000) to reduce the size of the serie.
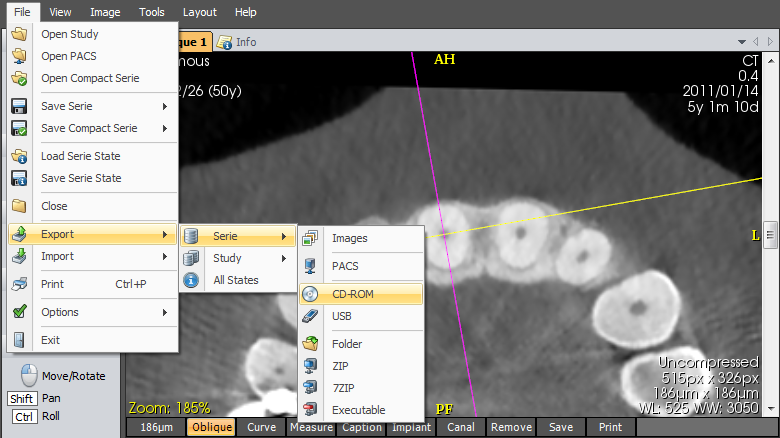
Export Images & Application
The study or the serie images can be exported as DICOM files with the application to a CD-ROM, a USB key, a folder or a ZIP file.
No CD burning software is required, the application can burn the CD-ROM by itself.
When the exported CD-ROM will be inserted in a computer, the application will automatically launch from the CD-ROM then load the exported study or serie and display it exactly as it was when exported with all the views, implants, measures and captions.